Sunday, January 27, 2013

Vogue 8774 done!!

Finally a sewing weekend.  I got to start and finish my chocolate cords.  I know they look purple in these pics, but in real life, it is a dark chocolate. 
The muslin that I made seemed promising, so I cut out the corduroy.....
 
I altered the fronts to have cut on, fly extensions, as I think it is just easier.  I made the front pockets deeper and extended them to reach past the center front, so as to be caught in the fly extensions. This not only provides some .... support... across the front, but it keeps the pockets from pulling open when wearing them.


The front pockets had to be completed before the fly could be sewn.


 I used my FAVORITE method of zipper insertion, Debbie Cook's zipper tutorial http://stitchesandseams.blogspot.com/2001/04/techniques-jeans-fly.html.  I printed it off and keep it handy, as I have to follow it EVERY time!!


Here is my zipper.  A trouser zipper from Coats and Clarks, from 1963!!!  This zipper is almost as old as I am!!

 
 Here you can see that the assembled front pocket extends beyond the center front to be caught in the fly extensions.

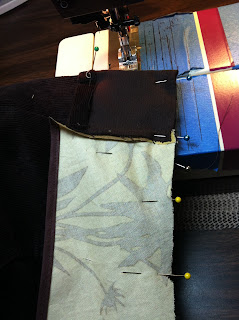
I drafted a fly shield to match my cut on fly extensions.


I made this card board fly template based upon a pair of RTW that I liked.
 
The Vogue pattern had the fly opening the opposite of what I made, I prefer my way.  ((-:


Vogue would have you stitch the belt loops in a tube and then turn right side out.  WHAT?
I cut a strip 1 1/4" wide
 Serged one side of it.  Folded in the non serged side, 1/2"

Then I folded serged side over about 3/8", to end up with a 1/2" wide belt loop.  Then I just top stitched 1/8" from each edge on the right side. Easy.  Below is the back side of the belt loops.

 
To get all my belt loops the same length, I cut, press and then steam them into submission, using a see through ruler to ensure they are all the same.
 
Time for the big test.... I sewed the inner leg seams together... and topstitched them (silly me)


Then I basted the side seams together and tried them on.  I almost cried.  I didn't take a picture, I thought I could not fix it and was distraught.  It appeared that I had a pool of fabric floating under each butt cheek.  Big enough for a boob or perhaps, an extra butt cheek.  Under each butt cheek.  Not a good look.  I was quite upset.  Damn muslin did not have this issue.  Of course, my corduroy had more stretch than the quiling cotton muslin.  So I pulled out a pair of RTW that I had previously altered a droopy butt on. Compared it to the pattern, the inner back leg was about 1" too wide at the crotch and ending about 8" down. 
 
So I picked all my topstitching out of the inner leg seams down about a foot on each inner thigh.  I then moved the back leg over the 1" to simulate having cut it off ( I was chicken) and basted it together and tried it on.  The boob pools were GONE.  I think I almost cried.  So I cut the excess off for real, and sewed up all the previously basted seams.  Ecstatic, I was.


Then I attached the waistband.  Damn.  The curvature of the band was just too much.  I do not curve much from hips to waist.  I also decided I did not like how thin the waistband was.  Being a low rise, a skinny waist band just cut me right across my .... muffin top.  Not good.  I did not have enough fabric to cut out a new one with the grain going correctly, so the wales do not run up and down on the waist band, but I don't care.  I widened the waist band and lessened the curve by cutting and spreading the upper portion of the waist band in 4 places, about 1/8" for each cut.


This worked out perfect.  I don't know where I read this following tip, or even how to describe it very well, but I cut the waistband lining to meet the outer waistband on the inside, vs having them meet at the end.  So when I turned it right side out, the outer waistband wrapped around to the inside and the lining can not be seen from the button edge. 


Makes for a very nice finish and less bulk right where you will be putting in buttonholes.


I used my jean a ma jig to help with the pressure while going over intersecting seams.  It worked great.


I went with real buttons on my jeans.  These buttons ARE older than me.  I just love old buttons and estate sales.  I use a nail under the button to preserve a 'space' so that the button is not sewn on so tight, that it is hard to button and unbutton.


Here they are on.  I am in love.  They were not hemmed yet in this pic, trying to decide perfect length.


Back view, 100% better than first time!

 
My waistband is about 2" wide, which is perfect for me.  I did not have enough matching buttons for the waist, but NO ONE will know.  Besides you.  and Me.


I added back pocket flaps, I just like the look and I used two belt loops in the center back and crossed them.


I am very happy with how these turned out.  I am wearing them as I type this up.  They are comfortable too!! 

 
Keep Sewing
Stay Happy


Monday, January 21, 2013

Vogue 8774, ready, set, muslin!

I have been wanting to make a pair of 'almost' skinny jeans for a while, more like straight jeans that make me feel skinny.  Not sure that is attainable.  (-:  View A really appeals to me and that is the look I am going for.  I did not want to cut into my corduroy until I was sure of the fit, so I actually made a muslin.  I have never made a pants muslin, unless you consider making a pair of pants, then deciding they are hideous and then using that expericence to change how you make them the next time, then, yes, I have made pants muslins.  A few of them.  I more consider a muslin to be an intentional practice that you NEVER planned on wearing.  All of this is to prepare you for my muslin material.  It is... UGLY. 


V8774


View A, the full body shot, is my goal.  I cut a straight 16.  Per the sizing on the pattern, I should cut an 18/20, but when I compared it to my RTW, 16 looked like a good fit.   I altered the pattern to have a fly extension, as I find this easier.
 
I deepened and extended the front pockets to reach the center front, to act as support.  The original pattern has full on fashion fabric for all layers of the front pockets.  I altered the pocket, facing, lining to be more like RTW.  Less bulk. 

 
I added 5" to the length, after comparing them to a RTW pair I like.  I did not insert a zip, because, well, I didn't wanna.    Here it is, the hiderocious muslin.  It is a quilting cotton, it was a 12' round tablecloth I inherited from someone who knew I liked to sew.  Funny the things people will give you.  Hard to tell if I like the fit at all, I get lost in the fabric.


There was excess fabric above the yoke in back just below the waistband. This made the butt sag down.  I will alter the actual pattern to remove 1/2" off of the yoke, starting at center back and tapering to nothing at side seams.  There does not appear to be a camel toe issue nor a butt wedie.  I was surprised, as I did not alter the crotch curve at all.  And most importantly, no discomfort while sitting.   Looking at these photos, I think I am too thick in the middle to have such small leg circumference at the hem.   Hard to tell.  I see these straight leg pants on other women of all different thicknesses, and I think they look good.  So I am going with it.  I reserve the right to change my mind and widen them a tad though if I choose.  The fun of sewing for yourself!! 
 
Next up...... cutting out the chocolate corduroy!!! 
 
 
Keep Sewing
Stay Happy

Sunday, January 20, 2013

Plans, they have a way of changing

My husband decided not to hunt, but to relax and hang out with me.  A weekend of sleeping in, hanging out together, romantic dinner out and one made together at home.  No sewing, I did manage to vacuum.  Awesome weekend. 

Keep Sewing
Stay Happy

Friday, January 18, 2013

A weekend's promise

It lays before me, 2 1/2 beautiful days... the possibilities are endless....new shirts for Ronan, clean house, another Butterick 3344 for me, in a beautiful bengaline?  vacuum, or perhaps a pair of chocolate cords?  laundry, Hmmmm..... that sounds divine..... chocolate, who can resist....So, Jalie 2908 or that Vogue I have been wanting to try since I bought it last summer....8774.  I think I have decided.  Chocolate cords.  Vogue 8774.  and maybe, just maybe, I will do some laundry and vacuum. 

Keep Sewing
Stay Happy
Saturday, January 12, 2013

Wool Tweed McCalls 5815....done!!

It is done!!!!!     Buttonholes holes sewn, buttons chosen and attached. Finished. I LOVE it. I am so happy with how it turned out. The hard work and worry was so worth it.  It feels really good to have challenged myself. 


Keep Sewing
Stay Happy

Friday, January 11, 2013

Buttons, buttons, whose got the buttons.....

HELP!!!
 
I do!!!   Now if I could only chose.....
 
I have taped 3 sets of buttons on the jacket front..... Which ones to use???
 
Light wooden?
 
 
Dark wooden ?


Dark leather?


I am leaning towards the middle one, the dark wooden......what do you think?
 
Keep Sewing
Stay Happy

Sunday, January 6, 2013

Tweed Jacket WIP progress.....

Well I figured out how to work around the issues in blogger, quite the pain, had to move my images from my pc to a Picassa album...
 
Now.... where was I. 
 
Oh yeah, stalling because I was afraid to insert the sleeves.  I am using the sleeves from Butterick 4610 on this McCall's 5815.  I was afraid that there would be too much sleeve cap to insert and I am not good at adjusting sleeve caps!!   If I messed up, I do not have any more wool to cut new sleeves.
 
 
So I attached the pockets, and sewed up the side seams and found it to be a bit snug in the hips.  I let out all seams (7 of them) from high waist to hem, about 1/8" which resulted in an extra 1 3/4" all around.  Too many Christmas cookies I guess.
 I had been sewing the lining along with the jacket, so that it is ready when the outer shell is complete.  So I figured I could just forge ahead with the sleeves and 'practice' by attaching the lining sleeves first.  I left an 8" section of one sleeve basted loosely for 'bagging the lining' later.


Well it turns out my sleeve fears were justified. I used the method of cutting a 12"x2" strip of bias to 'ease' the sleeves for easier attachment to the jacket. Well, first off, I attached the bias to the outside of the sleeve lining instead of the inside. Then I ripped the sleeve cap lining when I decided I could just rip the bias off instead of using a seam ripper. I know, I know, what was I thinking? Well I patched that, and forged ahead. I could NOT get the sleeve cap to ease into the jacket lining. There was just too much ease. So I had lunch and did the dishes. Then I removed the uncooperative linging sleeve (seam ripper this time) and tossed them. I decided I needed to remove some sleeve cap and traced out new sleeve lining pieces. I shortened the sleeve cap by 1/2" and forged on.
I was able to insert the lining sleeves into the jacket lining, but not without puckers. I decided I could live with a few puckers in my lining, but would have to figure out how to avoid them when inserting the wool sleeves.
 
 I put a generous lining pleat in the lining, as this seems to be the first place to fail.  In this shot, the pleat is still basted closed.  The white patch on the upper back is interfacing for support where my label will be attached on the right side of the lining.
 You can see the underarms pulling a bit in the sleeve fronts, at first I was horrified, but when I took the basting out of the center back, to release the lining pleat, this pulling dissappeared.  Phew.

Now on to the wool sleeves...... First, I remembered to alter the sleeve cap by the same 1/2" that I had shortened on the lining sleeve cap.  I decided to go ahead and use the bias strip method of easing.  Here is the 12"x2" bias (old piece of heavy linen) that I used to 'pre' ease the sleeve cap.  This time, I attached it from where the pattern markings specify to begin and end easing.  Believe it or not, I once again attached it to the outside of the fabric instead of the inside.  Dam.  But even so, I could see that this was still not enough easing.  So I carefully used a seam ripper to remove it.  I set the bias aside, and used a large basting stitch on the sleeve cap and gathered the ease the old fashioned way.  I then tried to shrink out that fullnes with the steam iron.  Once it had shrunk out pretty well, I then attached the bias strip again, ensuring that I was attaching it to the inside of the sleeve.  (-:  Here is the amount of ease that I was able to work in with this method.  I had one pucker and had to remove one stitch and finger press it flat while restitching.  Worked like a charm.

Here you can see the amount of sleeve cap that this allowed me to ease into the jacket.  (I cut off the excess bias strip hanging down.)


Without a single pucker.  I was amazed.  I am sold on the bias strip ease method!!

 
 I successfully inserted both sleeves.  I toyed with various methods of creating a sleeve head and determined that it looked best without one at all.  I think the bias strip already in the sleeve cap sort of acts like a sleeve head.  I did think that it needed shoulder pads though.  So I created shoulder pads.  I was not sure how to do that, so I just used some old fleece and draped it over the shoulder and then marked cutting lines as to what shape I thought a shoulder pad should have.  I made them two layers, one slightly smaller than the other, and zigzag stitched the two layers togethers around the edges.  I then tacked them to the sleeve seam allowance and to the shoulder while the jacket was inside out.  I made sure the smaller layer of the pad was on top as inserted inside out, so that it would be the layer against my shoulder when jacket was right side out.

 Here is the back view with shoulder pads tacked in place.
 The shoulder pads really help the shoulder area look much cleaner and smoother.  KellyGirl's  (duct tape dummy) arms stick out slightly which does not allow the sleeve to hang straight down.
 Back view with shoulder pads tacked in place.
 I was so psyched at how well the sleeves went, that instead of stopping after 8 hours of sewing, I went ahead with attaching the collar.  Then the lining was attached along all sides, including the front facing, except for the hem.  Here is the collar with it pinned in place for steaming.  I wanted to emphasise the double fold collar.

 
 Once the collar cooled completely, I was ready to 'bag the lining'   You turn the jacket inside out.

 
Then you press up the hem on the fashion fabric.
 
 
To ensure a perfect jump hem, make sure your lining is the same length as your finished hem length of your fashion fabric. ( I had to trim mine 5/8")


Then you pin the fashion fabric to the lining, right sides together, along the hem line.
 

Here is the hem line sewn, it is sewn with a 3/8" seam allowance.  See that fiddly 1/2" bit left at the end of the hem, where the front facing meets the hem? Well you are suppose to be able to sew that by machine, but for the life of me, I could not get it right.  So I just turned the jacket right side out ( via the 8" opening I left in the sleeve lining) and fiddled with it until it looked as it should and the handstitched it into place. 

 
You then attach the sleeve hem to the lining hem, via the 8" opening left in one sleeve.  Quite confusing while you are doing it, but it works very well.


Gratuitous lining shot, with my label.
 

Here is the jacket right side out and hem pressed.


Here is a closeup of the double collar.  (not really double, just has a pleat in it, starting at back of neck)


Now I just have to add buttons and buttonholes.  Not sure what type of buttons to use.....
 
Thank you so much to Judith of 'Made by J' and Mary of 'Mary Sews' for your comments and support! 
 
Keep Sewing!
Stay Happy!