Well I figured out how to work around the issues in blogger, quite the pain, had to move my images from my pc to a Picassa album...
Now.... where was I.
Oh yeah, stalling because I was afraid to insert the sleeves. I am using the sleeves from Butterick 4610 on this McCall's 5815. I was afraid that there would be too much sleeve cap to insert and I am not good at adjusting sleeve caps!! If I messed up, I do not have any more wool to cut new sleeves.
So I attached the pockets, and sewed up the side seams and found it to be a bit snug in the hips. I let out all seams (7 of them) from high waist to hem, about 1/8" which resulted in an extra 1 3/4" all around. Too many Christmas cookies I guess.
I had been sewing the lining along with the jacket, so that it is ready when the outer shell is complete. So I figured I could just forge ahead with the sleeves and 'practice' by attaching the lining sleeves first. I left an 8" section of one sleeve basted loosely for 'bagging the lining' later.

Well it turns out my sleeve fears were justified. I used the method of cutting a 12"x2" strip of bias to 'ease' the sleeves for easier attachment to the jacket. Well, first off, I attached the bias to the outside of the sleeve lining instead of the inside. Then I ripped the sleeve cap lining when I decided I could just rip the bias off instead of using a seam ripper. I know, I know, what was I thinking? Well I patched that, and forged ahead. I could NOT get the sleeve cap to ease into the jacket lining. There was just too much ease. So I had lunch and did the dishes. Then I removed the uncooperative linging sleeve (seam ripper this time) and tossed them. I decided I needed to remove some sleeve cap and traced out new sleeve lining pieces. I shortened the sleeve cap by 1/2" and forged on.
I was able to insert the lining sleeves into the jacket lining, but not without puckers. I decided I could live with a few puckers in my lining, but would have to figure out how to avoid them when inserting the wool sleeves.
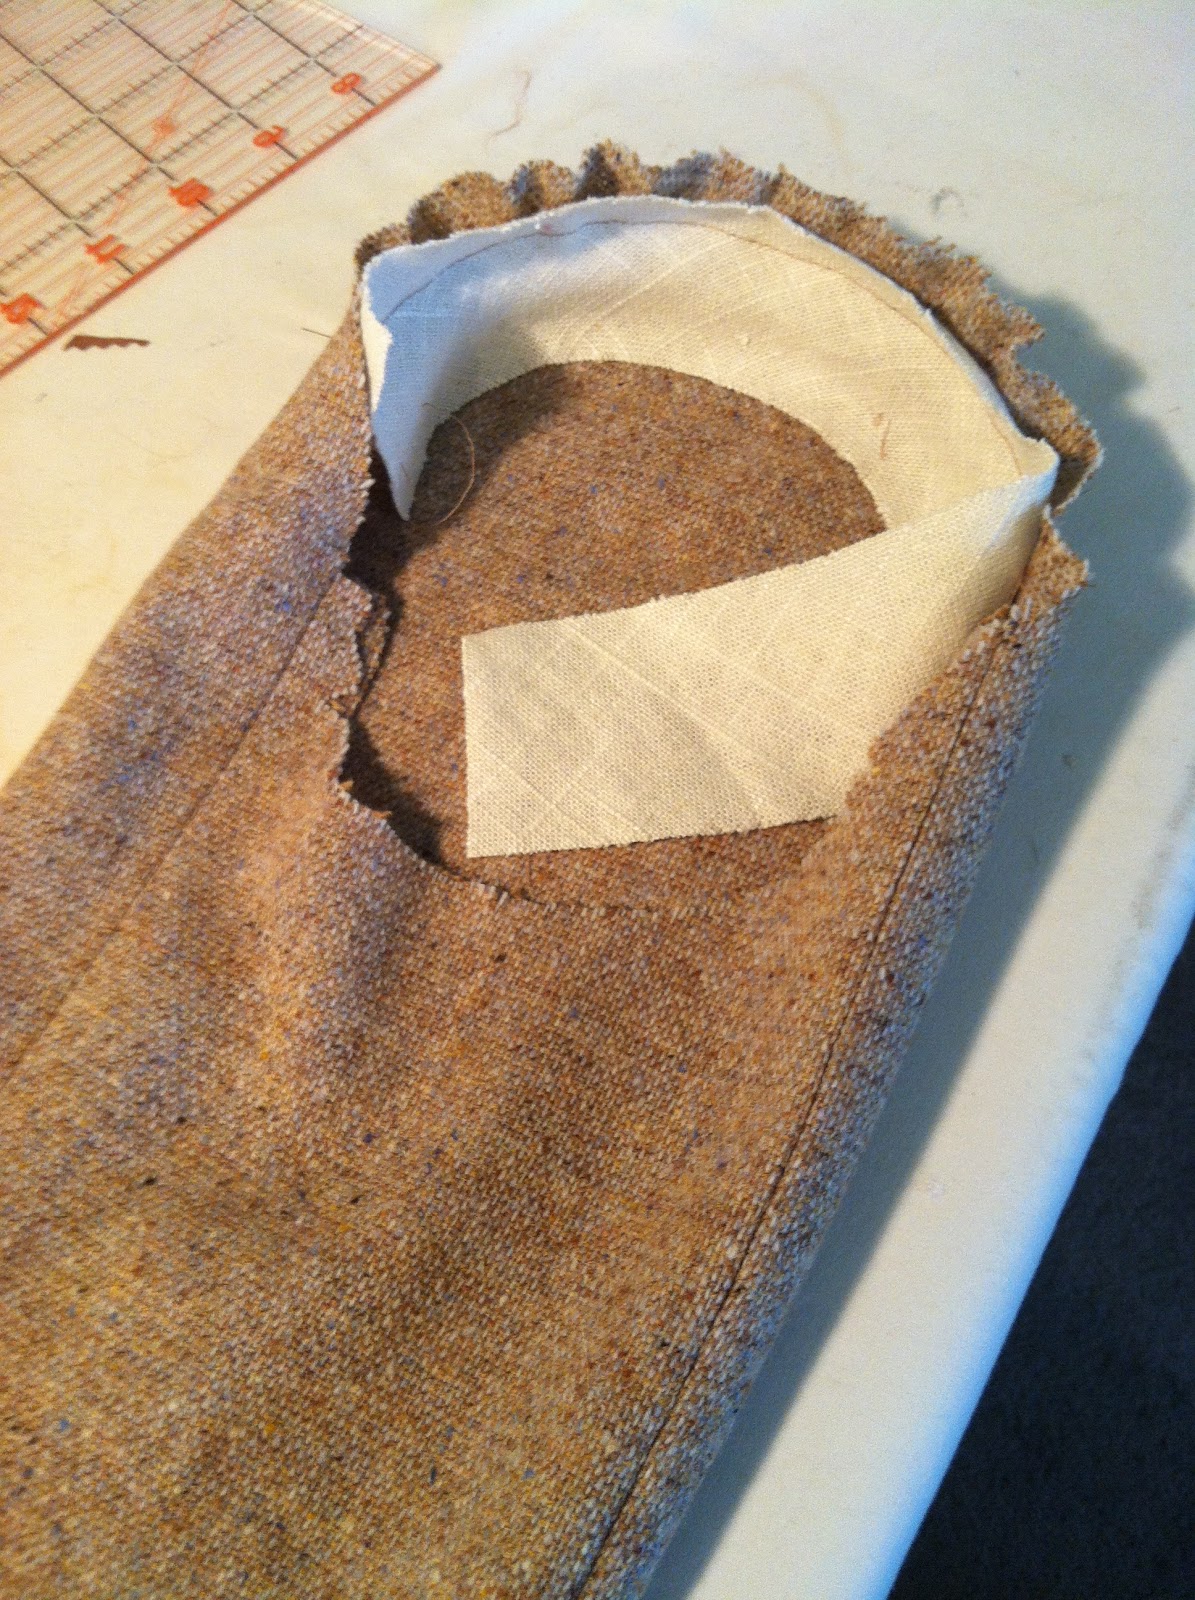
I put a generous lining pleat in the lining, as this seems to be the first place to fail. In this shot, the pleat is still basted closed. The white patch on the upper back is interfacing for support where my label will be attached on the right side of the lining.
You can see the underarms pulling a bit in the sleeve fronts, at first I was horrified, but when I took the basting out of the center back, to release the lining pleat, this pulling dissappeared. Phew.
Now on to the wool sleeves...... First, I remembered to alter the sleeve cap by the same 1/2" that I had shortened on the lining sleeve cap. I decided to go ahead and use the bias strip method of easing. Here is the 12"x2" bias (old piece of heavy linen) that I used to 'pre' ease the sleeve cap. This time, I attached it from where the pattern markings specify to begin and end easing. Believe it or not, I once again attached it to the outside of the fabric instead of the inside. Dam. But even so, I could see that this was still not enough easing. So I carefully used a seam ripper to remove it. I set the bias aside, and used a large basting stitch on the sleeve cap and gathered the ease the old fashioned way. I then tried to shrink out that fullnes with the steam iron. Once it had shrunk out pretty well, I then attached the bias strip again, ensuring that I was attaching it to the inside of the sleeve. (-: Here is the amount of ease that I was able to work in with this method. I had one pucker and had to remove one stitch and finger press it flat while restitching. Worked like a charm.

Here you can see the amount of sleeve cap that this allowed me to ease into the jacket. (I cut off the excess bias strip hanging down.)
Without a single pucker. I was amazed. I am sold on the bias strip ease method!!
I successfully inserted both sleeves. I toyed with various methods of creating a sleeve head and determined that it looked best without one at all. I think the bias strip already in the sleeve cap sort of acts like a sleeve head. I did think that it needed shoulder pads though. So I created shoulder pads. I was not sure how to do that, so I just used some old fleece and draped it over the shoulder and then marked cutting lines as to what shape I thought a shoulder pad should have. I made them two layers, one slightly smaller than the other, and zigzag stitched the two layers togethers around the edges. I then tacked them to the sleeve seam allowance and to the shoulder while the jacket was inside out. I made sure the smaller layer of the pad was on top as inserted inside out, so that it would be the layer against my shoulder when jacket was right side out.
Here is the back view with shoulder pads tacked in place.
The shoulder pads really help the shoulder area look much cleaner and smoother. KellyGirl's (duct tape dummy) arms stick out slightly which does not allow the sleeve to hang straight down.
Back view with shoulder pads tacked in place.
I was so psyched at how well the sleeves went, that instead of stopping after 8 hours of sewing, I went ahead with attaching the collar. Then the lining was attached along all sides, including the front facing, except for the hem. Here is the collar with it pinned in place for steaming. I wanted to emphasise the double fold collar.
Once the collar cooled completely, I was ready to 'bag the lining' You turn the jacket inside out.
Then you press up the hem on the fashion fabric.
To ensure a perfect jump hem, make sure your lining is the same length as your finished hem length of your fashion fabric. ( I had to trim mine 5/8")
Then you pin the fashion fabric to the lining, right sides together, along the hem line.
Here is the hem line sewn, it is sewn with a 3/8" seam allowance. See that fiddly 1/2" bit left at the end of the hem, where the front facing meets the hem? Well you are suppose to be able to sew that by machine, but for the life of me, I could not get it right. So I just turned the jacket right side out ( via the 8" opening I left in the sleeve lining) and fiddled with it until it looked as it should and the handstitched it into place.
You then attach the sleeve hem to the lining hem, via the 8" opening left in one sleeve. Quite confusing while you are doing it, but it works very well.
Gratuitous lining shot, with my label.
Here is the jacket right side out and hem pressed.
Here is a closeup of the double collar. (not really double, just has a pleat in it, starting at back of neck)
Now I just have to add buttons and buttonholes. Not sure what type of buttons to use.....
Thank you so much to Judith of 'Made by J' and Mary of 'Mary Sews' for your comments and support!
Keep Sewing!
Stay Happy!


